Stacks on Stack on Stacks -was the battlecry. Almost a year ago,
The Puddle Cutters
were planning the next rally and trying to develop an operational budget. With
some, but not much in the bank we were scoping the rally to fit our budget.
(weak) I said that I could double the gang's budget if they backed me up on
building a raffle bike. And that they did, Gang gang. The plan was to raffle off
a bike during our anniversary ride (mid-march) and use the funds we made to pump
up said jamz.
Barney very generously
donated a non-running roller PA50II Hobbit to the cause. The bike was a
ridden-hard & put away wet ex-Uphill Battle bike. It obviously was the source of
much joy & gaiety for its previous owner. I do love bikes with personality & it
truly wouldn't have taken much to bring it back to operational status. But
y'know what sells raffle tickets? Sex Appeal. So I said f**k it & my maximalist
tendencies took over. Full frame up rebuild, here we go.
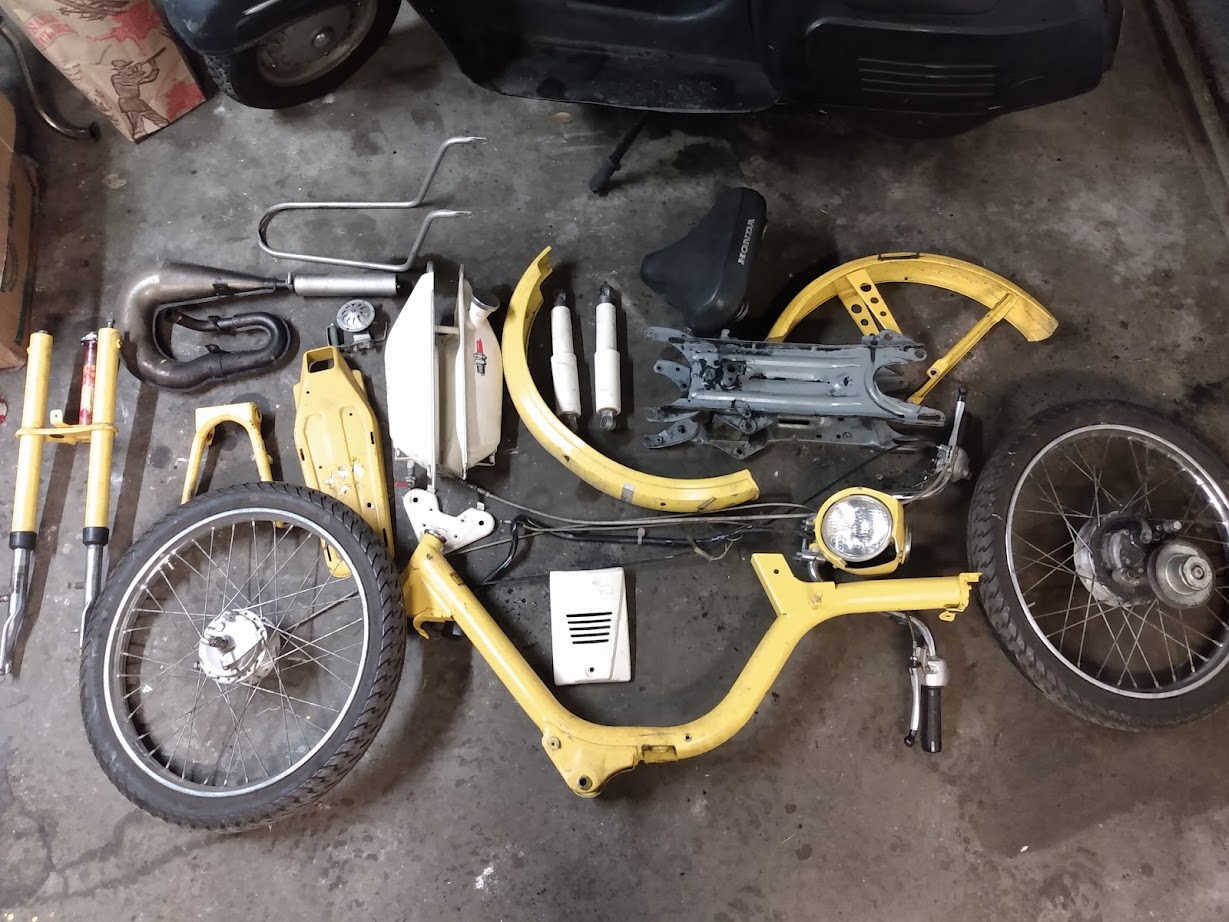
So for starters, here's what we had... The hobbit was missing most of its
plastics, had no spark, likely engine rebuild candidate, the gas tank had holes
in it and it had been crashed enough to prevent the pedals from working. #mopeds
On the plus side- the rims, tires, forks, frame & subframe were in good shape
and it had a complete wiring harness and most major parts, including a circuit
pipe.
So I took the bike apart as far as I needed to validate every system & redo the
paint. I washed the hell out of everything, before stripping the paint down to
the metal. I made a few choices: I really like bikes that look complete & making
everything work correctly was a key goal. The engine would get rebuilt with
every upgrade that still allowed for a mostly-stock appearance. I went for the
Metrakit, a stuffy crank, JBot/Treats variator, stock ignition, boyensen reeds &
a 20mm Tillotson carb (for extra razzle dazzle).
Every Hobbit in the world is yellow, or red if you're unlucky. I wanted a color
that that would make the raffle hobbit unique, but felt appropriate to 1978. I
settled on Oldsmobile Bronze engine enamel. -bc 1. Gas resistant & 2. Sparkles.
After welding up the gas tank I primered and sprayed everything. At this point,
Travis, Kyle & Kristin from the club had all donated body panels & a rare AF OEM
pedal crank to the cause.
If you've worked with the metrakit, that exhaust port is no joke. Even though
the studs were a match, it seemed silly to restrict the new engine to the
dimensions of the stock header. So I cobbled together a new header from pieces I
had laying around. Getting everything to fit correctly in the closer quarters of
a circuit pipe was a real challenge. But hey, at least it looked nice when it
was done.
At this point in the process, I had blown up our planned timeline and missed the
Anniversary ride deadline. Kyle / everyone was super cool about it. We had
another opportunity a few weeks later at The One Moto Show's kick-off night. At
this point I was assembling the bike, including the persnickety wiring. I really
wanted everything to work, including the stock ignition switch. I was able to
rebuild the old switch using a new lock column off treats.


At this point I had everything to finish the build of the bike & the One Show
deadline was approaching quickly. I assembled the bike enough for photos, but
the engine had a persistent air leak that wouldn't allow the bike to run for
more than a few seconds. We were already selling raffle tickets and I was indeed
panicking. As it was the only unorthodox component, I swapped the 20mm Tillotson
back for the stock carburetor (which had been bored to 13mm). The air leak
persisted even then. I was sweating bullets as the raffle was within 36hrs. I
pulled the motor to look for broken gaskets, etc. The flywheel side seal was
brand new from the rebuild kit, but did not feel snug. I replaced it with
another seal I had laying around. After reinstalling the engine, by the power of
Greyskull, the hobbit started and ran. (deep breaths) The jetting was all over
the place, but had enough power to get me to the One Show event. The
raffle Hobbit was the Belle of the Ball that night and we sold out of
tickets (limited to 250). The Puddle Cutters did the raffle live on
Instagram and a lucky fella from Washington state won:)


I got lucky again in that the winner of the Hobbit was not physically present at
the event. This gave me precious *precious* time to correct the jetting. After a
few rounds I had the Hobbit ripping hard and lifting the front wheel.
'Launching' is a good word for it, I see why so many guys dig these built
hobbits. I put a huge amount of elbow grease into the project, but it takes a
village or whatever. So many people contributed to donate parts, or worked to
coordinate the raffle itself, or promoted online. In the end, the raffle bike
was a tremendous success, doubling our raffle budget and allowing our small club
to go hard on the rally. My heartfelt thanks to everyone who contributed to the
project & everyone who bought tickets!
Before:
After: