I heard that Toyota spends over a million dollars a day on research and development. If you're a enormous company like Toyota, having an robust R&D department allows your company to compete in an increasingly technologically sophisticated market. But, 'research and development' is a nice way of saying repetitive failure. I will remind myself that I am engaged in 'research and development' and remember how far I've progressed in making things. Over a month ago I was busy cracking the combination of heat and time necessary to produce the plastic flywheel covers. A modification to the rig had eliminated the wrinkles that were plaguing the process.
The picture at right is a bunch of the 'almost good enough's' that were fully formed but flawed in one way or another. Since the whole point of this is to make your bike look cooler, having a part with a distracting flaw simply won't do. The biggest problem, is getting the plastic to remove cleanly off the rig. Right now the mechanism that is supposed to eject parts, mostly just breaks them. Also, the hotter the plastic, the more detail it picks up, but this causes bubble to form -so that's the other problem. I haven't worked on this in awhile because I got a gig with OMSI, a gig that has recently concluded.
While at OMSI, after a brief conversation, one of the exhibit guys I worked with gave me his bottles of Smooth-On 300 casting resin. 'Since I don't need them.' This fired up my interest in my old cylinder casting schemes. If you've been on the Moped Army Buy/Sell forum, you may have noticed my attempts to collect suitable specimens for this project.
Mopeds have no shortage of diversity, there are a billion types out there. But only a select group take center stage: Puch/Tomos, Peugeot, Honda Hobbit, Derbi, and to a lesser extent Vespa, Mobylette and Minarelli. If you choose a rare bike, after all the effort of restoration, rebuilding and maintenance, you still only have a bike that goes 25mph, and will likely be at the pack of the pack in a ride, or struggle to climb hills. So, if I'm going to dinker around with cylinder production, I'd like to do so in a way that encourages diversity in the "scene." Some people (Aaron, Joeped, Nate) are f**kin radical enough to offer up their old cylinders to be apart of this mutant rebellion, others I had to buy. But within a relatively brief time, I've collected -or have en route a stable of barrels ready for cloning.
Last night I went with Liz to pick up the Garelli NOI cylinder from Nate. As we we're talking I realized that my explanation of the 'cloning' process doesn't make any conversational sense. So, for anyone interested, I drew up a sketch to illustrate this phase of the process. *also- anyone who has experience with this (Jan Thiel, I'm looking at you) let me know what I'm doing wrong.
First off, know that the objective is to create an accurate wax copy of the cylinder, with the important exception of the port layout, transfers and exhaust. -we eject the stock stuff. But again- a wax cylinder is what we want.
1. If you were to fill all the space inside a cylinder with say, silicone; it would create a copy of the ports, transfers, the bore itself, etc.. If you pulled that silicone out of the cylinder, you would have a 'negative' of that cylinder. - A 20hp Malossi MHR scooter jug in this case. Thats what #1 is here in the drawing.
2. Take the negative (#1) and then coat it with wax, and keep building up the wax around it, filling in all the nooks and crannies, giving it some thickness. Then remove #1 and what you've got left is a wax copy of the internals of the original cylinder. Not a negative but a copy. This part (#2) is the insert.
3. This is actually a two-part step here. The blocks pictured are a mold of one of the cylinders we're cloning, a Jawa 207, for example. Presuming we've already made that mold, we take the empty mold and plug the insert (#2) into the mold (#3) Close the mold together and fill it with wax. Obviously, we'll make sure the wax doesn't fill the cylinder, just around it.
When you pull the mold apart, you should have a clone of a Jawa 207 cylinder with Malossi MHR internals. This explanation is an over-simplification, but shows the process. There are lots of adjustments that have to be made to account for stroke, crown height, rod length, etc.. differences. You might have noticed that the Vespa and Derbi cylinders above both have a "registration" (highlighted) cut in the bore. After a mold is made from these cylinders, this insures the wax insert stays centered in the mold during the wax filling portion.
As mentioned before, I'm sure there will be plenty of trial and error on the way. (like Smooth-On 300, not so good actually) Because of these difficulties, and because my money is limited, -who are we kidding - my attention span is too, I hope you'll vote in the poll on the sidebar, to prioritize my efforts.
Wednesday, November 24, 2010
Saturday, October 2, 2010
OK, some things are 87% done.
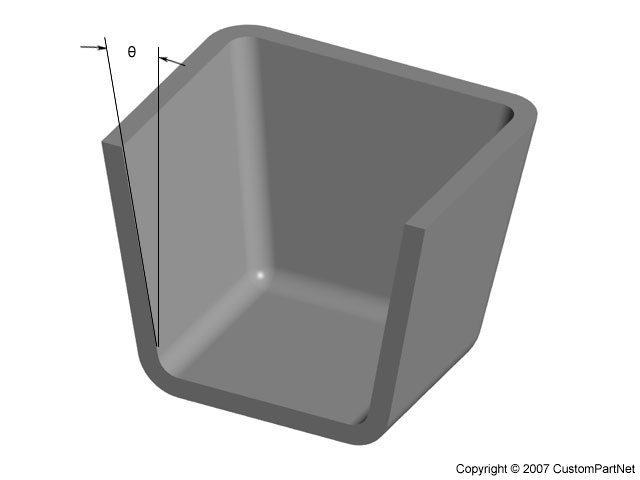
The other day I had my first measure of success vacu-forming a clear flywheel cover for a Puch engine. The mod I mentioned in the previous blog post definitely helped and the plastic did exactly as it was supposed to, and fitted the shape perfectly. At this point I hadn't considered how difficult removal of the plastic would be, especially since the buck has a zero draft angle. As a result, getting the plastic piece off the vacu-form rig was pretty dodgy and I cracked and chipped my piece in a few places. Some good things came of it though. I now have a built in mechanism for removing the part off of the rig & I'll now use a slightly thicker plastic for better durability.

Tuesday, September 28, 2010
everything is always 85% done
Knowing that I'd lose access to a really awesome workshop when I left EMP|SFM, I tried to make stuff that I knew I was going to use at some point but probably not right now. Plan B is certainly going to get a inner-rotor ignition at some point, ala ciaociao. A standard Puch flywheel weighs about a pound, a standard Vespa flywheel weighs just under three pounds. -And for a 'race' bike, thats like riding with the brakes on. Which I do enough of, already.If you want a ciaociao flywheel fan, you'll need a plastic kinetic TFR fan. The guys at Cosmopolitan Motors were very helpful locating one for me. You'll also need an inner rotor ignition, probably off of a smaller CC dirtbike. PVL makes some really good stuff. Just make sure its a 2 stroke not a 4 stroke. I got started by eliminating 1.5mm thick disc from the underside, inner portion of the plastic fan. I did this using lather-beams. Using that as reference, I drilled a .5" hole in a piece of aluminum, and fitted a hex bolt & nut through the hole- which is the same diameter as the crankshaft- to then set up in the lathe. I lathered the aluminum to the same diameter as the underside of the plastic fan, then took that down to 1.5mm thick. I stepped it out to then match the inner diameter and thickness of the plastic fan's hole, and also stepped another 1mm as a spacer. There is something really satisfying about the look and feel of freshly cut metal. -and I'll just let that last statement be creepy, whatevs. This project still has aways to go, but I think this is the only part that I could not do at home. We'll see.
I also made a rear wheel alignment/ adjuster do-hickey, because Plan B could use it.
I've been screwing around with a vacu-forming rig in hopes of maybe making some transparent flywheel covers. So far I've been close but no cigar. I believe I need better suction to pull out the wrinkles. I have one more modification to try on the buck before I rent a Shop-Vac and try that. Work harder, Dirt Devil!!
Finally, I have just moved to Portland. Thanks to basically 100% of people that I have talked to about or during the move, I am yes aware that Portland has an inordinate number of excellent coffeehouses, strippers and microbreweries. The move was bittersweet, mostly because I liked Seattle a lot, and because my career seemed like it was getting a toe-hold as an exhibit designer/fabricator. Portland is known as a design-savvy town, but unless I work for MotoCzysz or Nike I don't know who would hire me? plaid pantry?
Tuesday, September 21, 2010
The Mexicana 400
Le Mans. Isle of Man. Baja. Laguna Seca. Dakar. Mugello. Bonneville. The Nürburgring. Daytona. Some race events throw such a wide net on our imaginations that the location itself overwhelms the record books, the teams, the engineering and transforms a location on a map into a symbol for humankind's unending quest to redefine the physical limits that shape our lives. Missing from that short list is a flat, grassy field in New Somerset, Ohio where Man and machine struggle against one another -and themselves- for Glory and Victory only known to a special few. The event is, of course, The Mexicana 400.
When I reach back through the sundered veil of time, and recount my misspent 20's; many of the most grotesque moments of pitched debauchery and frivolity were had at the annual Band Camp rally, hosted by The Pittsburgh Vintage Scooter Club (PVSC). Every year, they rent an isolated marching band practice field, and create a vast, drunken slumber party for anyone with a penchant for underpowered italian machinery. One highlight is the Saturday afternoon games. The most epic of which being the Mexicana.
For the un-initiated, let me explain the event. The Mexicana combines a flat-track circuit race, an eating contest, and a drinking contest. Before the race, the scooters are lined up on the track, engines off, with racers gathered off to the side (LeMans -style start). Racers must wear the ceremonial garb to compete: 1. Sombrero -large, caricaturesque & 2. A Curly Moustache - Optional for those already with Mustache. At the word "Go!" racers must start by eating a foul, uncooked burrito. Once they have finished -with an empty open mouth, a judge approves them to go. They run to the scooter, start it up and complete one lap around the track. On returning, they now must drink one Corona -no foaming or overflow allowed, the beer must be drank in entirety. A judge again validates the drank beer and the racer heads out for a second lap. On completion of the lap, the racer drinks a Margarita, and after the judge, leaves for the third lap. Upon finishing the third lap, the racer takes a shot of tequila and heads out for the fourth and final lap. The first racer to cross the line wins, unless they puked -in which case, they have to restart the entire event. Its tons of fun to watch and race in, but it is serious seriuzz business if you're trying to win.Let's Review:
PRO TIP: Bring a Napkin, Burritos are slimy, the napkin helps you keep hold of the damn thing, and keeps the slime off of your throttle.
PRO TIP: Relax/Sustain your swallow reflex, and exhale out of your nose -it will allow you to pour the whole beer down your throat.
PRO TIP: Even seemingly dry grass is very slippery, use the rear brake only and sparingly.
PRO TIP: Cheating is not permitted, but highly recommended, check your fuel tap Noob!
The only reason I won the Mexicana the year I did was a combination of good luck and tenacious effort. I had been trying & failing for several years in a row. Losing because certain racers would start the first lap without finishing the burrito, simply shoe-horning it into their mouths and taking off. Then around corner 3 on the other side of the track they'd spit it out. Creativity has its rewards. The year I won it, was the first year the PVSC judges were very strict about finishing the burrito in front of them. I know I wasn't the fastest on the track, and not the fastest eating the burrito, but I was the fastest of both. I also benefited from Nak'd Dav "stalling" in front of my nearest competition, Greg McCormick who still nearly caught up to me. Whew!
The burrito and the corona are what really decide the race. Some people think I was working at Zoot Scoots because I needed a 'job' or was good at 'mechanics'. In reality, I was studying at the foot of a hyperbolic drinker, A Shaolin Monk with a sixer of Becks. He guided my path towards enlightenment and got my Corona-Chug-Time (C.C.T.) under 8 seconds, which was still pathetic compared to his own C.C.T. of approx. 4.3 seconds.
Here's a clip of me getting p'wned back in '06. I got way far back by my borrowed machine refusing to start, then stalling around turn two of the first lap. Note my obvious annoyance with the "burrito wedgers". Also, near the end of the clip everybody "OOhhhhs" at Joe Casola (on the green bike), nearly passing Greg, but then wiping out on the last corner, unfortunately off-camera.
Here are some other random pictures of PVSC Band Camp silliness, of which I am very nostalgic for:
Friday, August 27, 2010
Come get a taste, Mantooth!
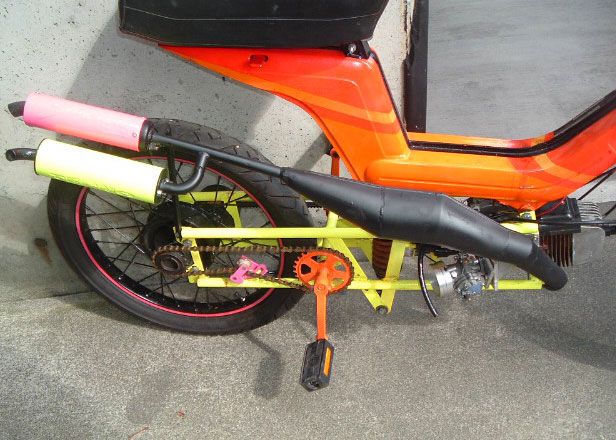
Truly the pictures do not do justice to the Naz's tight welding and metal work, nor do they highlight Phil's crazy powder coating. Nice Work Fellas! It is very good to have such talented and generous friends. So with the pipe and sub-frame completed, here's a look at Plan B after her 2010 makeover:
Dang! Some advice for future sub-frame builders:
1. USE A JIG. warping will occur.
2. Save the old sub-frame.
3. Lots of parts had to be customized or ordered special.
The belt is a weird extraaa-long AX51. I wasn't sure of the dimensions i needed, so i just ordered several and tried them all until I had a winner. Also, the brake cable is custom too, again extra long. Speaking about the pipe again, there are absolutely zero ground clearance issues. When i lay the bike over on its side, the first contact point is the pedals in the vertical position. Also, the twin silencers are begging for flamethrowers to be added. That may be a special Team Nerdspeed edition ....
So in spite of all the work done, Plan B was still not happy come race day (carb/fuel issues) and I ended up borrowing Naz's Lomos for the race. Practice and qualifying went well, Naz JJ and Travis all pushed towards the front of the pack. Phil suffered a breakdown in practice and Travis was having considerable trouble with the new disc brake front end on the hobbit. In the qualifying run I thought I had a legitimate shot at a podium finish with so much competition on the sideline, but NASCAR pit crew team efforts in the paddock got Travis' machine back in action, and I decided sharing is always the right thing to do, so Phil took the Lomos for the second qualifying run and the race. The plucky and reliable Lomos kept its head on a swivel, which is what you do in a vicious cock fight. This is me keeping the hyenas at bay:
For awhile now, Liz & I have been trying to sell her Vespa P200e. It wasn't going very well for along while, so after a new paint job didn't work, and dropping the price tag several times, we had some fun & made a commercial:
Less than 36hrs. later we sold it to a very excited girl and her friend who was from ironically, Columbus.
Friday, August 6, 2010
My blog post brings ALLAH boys to the yard
I have way too much to update, and no time right now, but I want to share this. When I was working on "To boldly go waaay off topic" I wanted to make sure I wasn't spreading misinformation, so I did a bunch of fact checking to be certain. If you recall that post was about NASA, and the importance of manned spaceflight. I remember reading/hearing that the first operational integrated circuit computer was aboard the Apollo missions, so I was googling things like "Missile Navigation" and "Rocket Guidance Computer" over and over and over again. The Very Next Day I received an email unlike anything I've ever seen before, and not in my spam folder either:
From: Bintu Mahmud
Subject: ALLAH CALLS ON YOU
I am Mrs. Bintu Mahmud. Please contact my lawyer
Ramli Sariman (barr_ramli.sariman@gala.net) for a
very important thing ALLAH wants you to do for
Him. May ALLAH be with you always.
Something tells me big brother noticed a pattern in my web queries and wants to know whose team I'm on. Kinda funny/scary depending on your take.
From: Bintu Mahmud
Subject: ALLAH CALLS ON YOU
I am Mrs. Bintu Mahmud. Please contact my lawyer
Ramli Sariman (barr_ramli.sariman@gala.net) for a
very important thing ALLAH wants you to do for
Him. May ALLAH be with you always.
Something tells me big brother noticed a pattern in my web queries and wants to know whose team I'm on. Kinda funny/scary depending on your take.
Wednesday, June 30, 2010
Let's talk about my fat ass
Can we talk about my out of control obesity? Certainly, the years have ravaged my once boyish figure; but it was still to my surprise that I all but bottomed out my suspension when I first sat on Plan B with the new subframe. I built the subframe around a shock I've had laying around for a while, a spiffy Malossi RS24 shock (by Paioli) originally designed as the front swingarm shock for an Italjet Dragster. I suspect the difference in geometry is to blame, and my addiction to transfats and sweet, empty carbs.
Regardless, I needed to find a beefier shock with similar dimensions to the one I had, but that was a bit tough, and most quality shocks of this sort go for around $400, even a good spring for a motorcross application retails around $120, and the dimensions would still be a rough fit. Luckily, I was able to get a couple of random industrial springs with appropriate specs for not very much money. The thinner one is rated at 470lbs. and the thicker at 790lbs. Both springs match the outer diameter of the original and are 8in. long.
HELLO LIZ!
But that's where it gets complicated, as the shock will accept a spring of a maximum 5 3/8" long and has a travel of about 2". I'm having a tough time staying in front of the math on this one, as I'll have to cut off some length to allow the shock to fit, but also compress the shock enough to keep the sag within a usable range. So, I'm willing to accept a fair bit of trial and error through this process.
I headed down to Naz & Phil's shop to use the press to get the spring on, but it was a smidge more involved. After trimming an inch off each spring, I cooked the coil top with a torch to flatten it out. Ultimately, I need to fab up a tool to help rebuild the shock. This process had a few false starts and took nearly all day. After the tool was done, the spring installed easily. Knocking an inch out of it's length reduces the spring's max load to 347lbs, but that will hopefully prevent my massive girth from dragging the motor across the asphalt.

Regardless, I needed to find a beefier shock with similar dimensions to the one I had, but that was a bit tough, and most quality shocks of this sort go for around $400, even a good spring for a motorcross application retails around $120, and the dimensions would still be a rough fit. Luckily, I was able to get a couple of random industrial springs with appropriate specs for not very much money. The thinner one is rated at 470lbs. and the thicker at 790lbs. Both springs match the outer diameter of the original and are 8in. long.HELLO LIZ!
But that's where it gets complicated, as the shock will accept a spring of a maximum 5 3/8" long and has a travel of about 2". I'm having a tough time staying in front of the math on this one, as I'll have to cut off some length to allow the shock to fit, but also compress the shock enough to keep the sag within a usable range. So, I'm willing to accept a fair bit of trial and error through this process.
I headed down to Naz & Phil's shop to use the press to get the spring on, but it was a smidge more involved. After trimming an inch off each spring, I cooked the coil top with a torch to flatten it out. Ultimately, I need to fab up a tool to help rebuild the shock. This process had a few false starts and took nearly all day. After the tool was done, the spring installed easily. Knocking an inch out of it's length reduces the spring's max load to 347lbs, but that will hopefully prevent my massive girth from dragging the motor across the asphalt.

Subscribe to:
Posts (Atom)